Felting is a fascinating process that transforms fluffy wool fibers into a strong, cohesive fabric. It’s an ancient craft, but it remains popular today for its versatility and eco-friendliness. There are two primary methods: wet felting and needle felting.
Wet Felting: The Basics
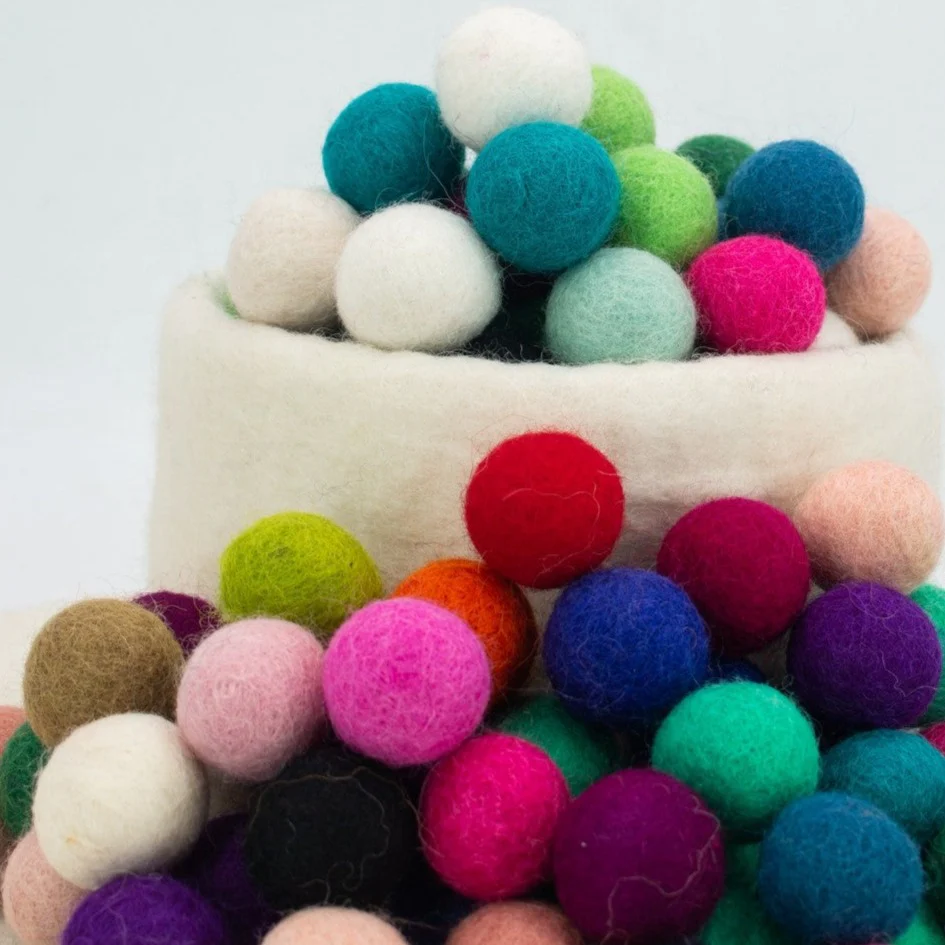
Wet felting involves using water, soap, and agitation to interlock wool fibers. It’s a hands-on process that allows for creative expression.
To begin, gather your materials:
- Wool roving: This is the fluffy, unspun wool you’ll use.
- Warm water: Lukewarm water works best.
- Liquid soap: A mild detergent is ideal.
- A felting mat: This provides a non-slip surface.
- Bubble wrap: For added texture.
- Towels: For drying.
Once you have your supplies, follow these steps:
- Prepare your workspace: Cover your work surface with a felting mat or bubble wrap.
- Lay out the wool: Place a layer of wool on the mat, overlapping the fibers slightly. Add another layer perpendicular to the first. This creates friction when felting.
- Apply soapy water: Sprinkle the wool with warm, soapy water. Use your hands to gently distribute the water evenly.
- Begin agitation: Gently rub the wool with your hands, applying pressure to move the fibers together. You can also use a rolling pin or a ball of wool to agitate the fibers.
- Add layers: As the wool begins to felt, add more layers and soapy water.
- Fulling: Once the wool is felted to your desired thickness, you can full it by rubbing it vigorously against a rough surface, like a washboard or a concrete slab. This helps to shrink and thicken the felt.
- Rinsing: Rinse the felt thoroughly with cold water to remove soap residue.
- Drying: Gently squeeze out excess water and lay the felt flat to dry.
Needle Felting: A Different Approach
Needle felting uses special barbed needles to interlock wool fibers. This method is great for creating small, detailed objects.
You’ll need:
- Wool roving
- Felting needles: Various sizes are available.
- A felting pad: Protects your work surface and provides resistance.
- Finger guards: To protect your fingers.
Here’s how to start:
- Prepare your workspace: Place the felting pad on a flat surface.
- Gather the wool: Pull small pieces of wool and layer them on the felting pad.
- Begin felting: Hold the felting needle perpendicular to the wool and stab it into the fibers. Use a stabbing motion, moving the needle in and out.
- Build your project: Add more wool as needed and continue felting to shape your desired object.
- Finishing touches: Once the wool is firmly felted, you can add details or embellishments.
Tips for Successful Felting
- Experiment with different types of wool: Merino wool is popular for its softness, but other wools offer unique textures.
- Don’t be afraid to make mistakes: Felting is a forgiving craft.
- Practice makes perfect: The more you felt, the better you’ll become.
- Consider using templates: For precise shapes, trace patterns onto paper and place them under the wool.
- Explore different techniques: There are many variations of wet and needle felting to try.
Felting Projects: Unleash Your Creativity
Felting offers endless possibilities for creating unique and functional items. Here are some ideas to inspire you:
- Home decor: Create colorful wall hangings, coasters, or bowls.
- Accessories: Make scarves, hats, or brooches.
- Toys: Delight children with adorable animals or puppets.
- Jewelry: Design one-of-a-kind earrings, necklaces, or bracelets.
- Gifts: Personalize presents with handmade felt items.
Felting and Sustainability
Felting is an eco-friendly craft. Wool is a renewable resource, and the process doesn’t require harmful chemicals. By choosing to felt, you’re making a positive impact on the environment.
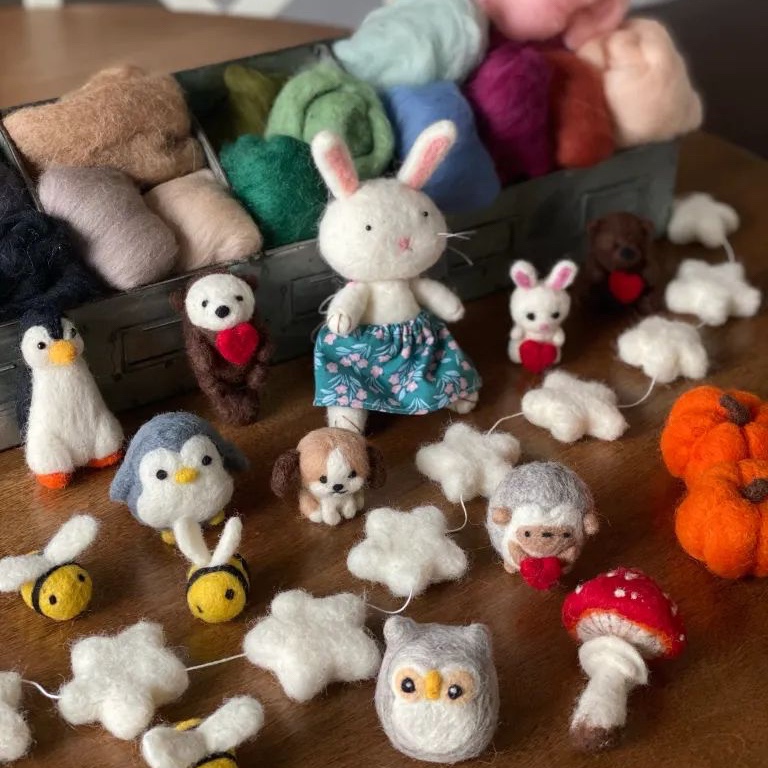
Needle Felting Process (Optional)
Needle felting, a form of dry felting, is a captivating technique that allows you to sculpt wool fibers into three-dimensional creations. It’s a versatile method that can be used to create everything from tiny animals to decorative wall hangings.
Essential Tools and Materials
Before diving into needle felting, gather the following:
- Wool roving: This is the fluffy, unspun wool used for felting.
- Felting needles: These specialized needles have barbs that interlock the wool fibers. Different sizes are available for various projects.
- Felting pad: This protects your work surface and provides resistance for the needle.
- Finger guards: These protect your fingers from accidental needle pricks.
- Optional: Foam or sponge, for shaping larger pieces.
The Needle Felting Process
- Preparation: Choose your wool color and amount based on your project. Place the felting pad on a stable surface.
- Building the Base: Start by pulling small pieces of wool and layering them on the felting pad. The more layers, the thicker the base.
- Needle Insertion: Hold the felting needle perpendicular to the wool and stab it into the fibers. Use a stabbing motion, moving the needle in and out repeatedly.
- Shaping: As you felt, gently mold the wool into your desired shape. Use your fingers to manipulate the fibers.
- Adding Details: For intricate details, use finer needles and smaller amounts of wool. You can create features like eyes, noses, and limbs.
- Finishing: Once your piece is fully felted, gently smooth the surface with the needle to remove any rough edges.
Tips for Successful Needle Felting
- Start small: Begin with simple shapes to build your confidence.
- Change needle angles: Varying the angle of your needle can help create different textures.
- Work in layers: Adding wool in layers provides better control over your project.
- Take breaks: Needle felting can be repetitive, so it’s essential to rest your hands.
Common Needle Felting Projects
Needle felting offers endless possibilities. Popular projects include:
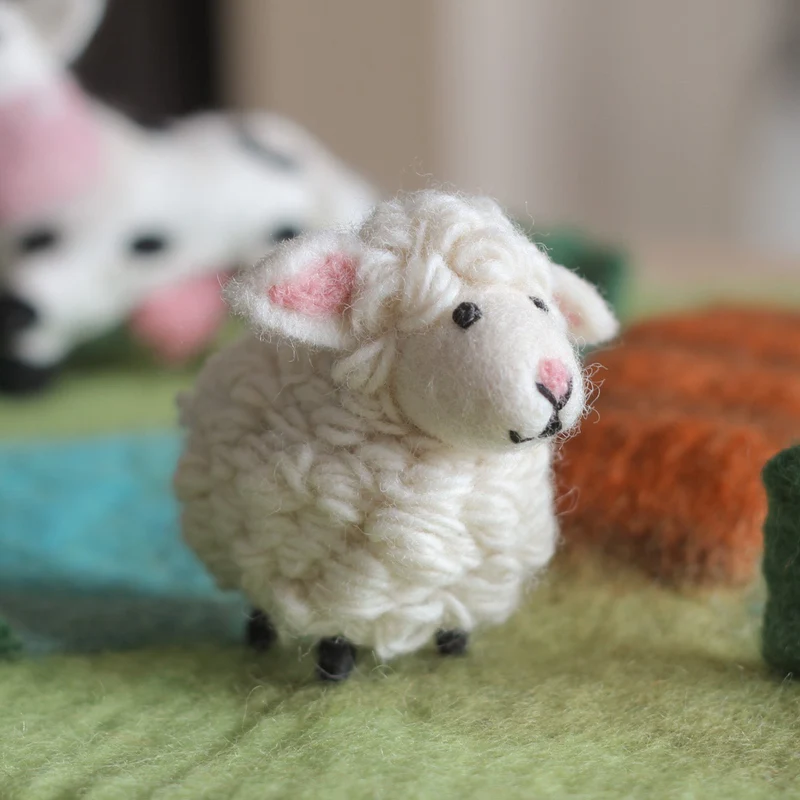
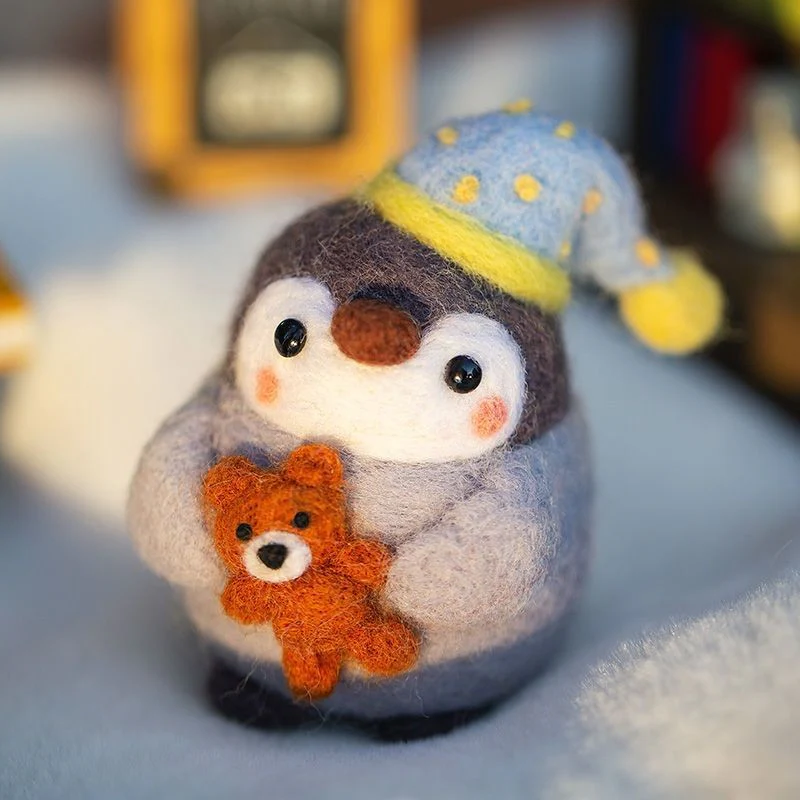
- Animals: Create adorable creatures like cats, dogs, birds, and farm animals.
- Decorations: Make ornaments, brooches, or keychains.
- Home decor: Design wall hangings, coasters, or bowls.
- Figurines: Bring your favorite characters to life.
With patience and practice, you can master the art of needle felting and create stunning pieces.
Finishing and Caring for Felted Wool
Once you’ve mastered the art of felting, the next step is to refine your creations and ensure their longevity. Proper finishing and care are essential to preserving the beauty and durability of your felted pieces.
Finishing Touches for Felted Wool
Finishing is the final stage of the felting process, where you add those perfect details that elevate your piece from good to exceptional.
- Embellishments: You can enhance your felted creations with various embellishments. Consider adding beads, sequins, buttons, or embroidery for a personalized touch. For a more natural look, incorporate dried flowers, leaves, or feathers.
- Seams: If your project involves sewing pieces together, use a strong, felted wool thread or embroidery floss. Overlock or zigzag stitches work well for preventing unraveling.
- Blocking and Shaping: For items like hats or bags, blocking is essential. Use a foam or wooden block to shape your piece while it dries. Pin it securely to maintain the desired form.
Caring for Your Felted Wool Treasures
Proper care will extend the life of your felted items. Here are some tips:
- Gentle Cleaning: Felted wool is generally quite sturdy, but it’s best to avoid harsh treatments. For light stains, spot clean with a mild detergent and lukewarm water. For deeper cleaning, hand wash in cool water with a wool-specific detergent. Avoid wringing or twisting the fabric.
- Air Drying: Always air dry your felted items. Avoid using a dryer, as the heat can shrink or damage the wool. Reshape the item while it’s damp to maintain its original form.
- Storage: Store your felted pieces in a cool, dry place, protected from direct sunlight. Mothballs or cedar blocks can help deter pests.
- Refreshment: Over time, felted wool may lose its fluffiness. To restore it, gently steam the fabric or place it in a steamy bathroom for a short period.
Common Felting Issues and Solutions
Even experienced felters may encounter challenges. Here are some common issues and how to address them:
- Uneven Felting: If your project is unevenly felted, additional agitation or fulling might help. You can also add more wool to thicker areas.
- Over-Felting: If your wool has felted too much, it’s difficult to reverse the process. However, you can often incorporate the overly felted piece into another project.
- Shrinking: Felted wool typically doesn’t shrink significantly, but if it does, it’s usually due to incorrect drying methods. Avoid high heat and wringing.
By following these guidelines, you can enjoy your felted creations for years to come. Happy felting!
Whether you prefer the wet or dry method, felting is a rewarding hobby that allows you to create beautiful and functional items. With a little practice, you’ll be amazed at what you can achieve. So gather your supplies, let your imagination run wild, and embark on your felting journey!