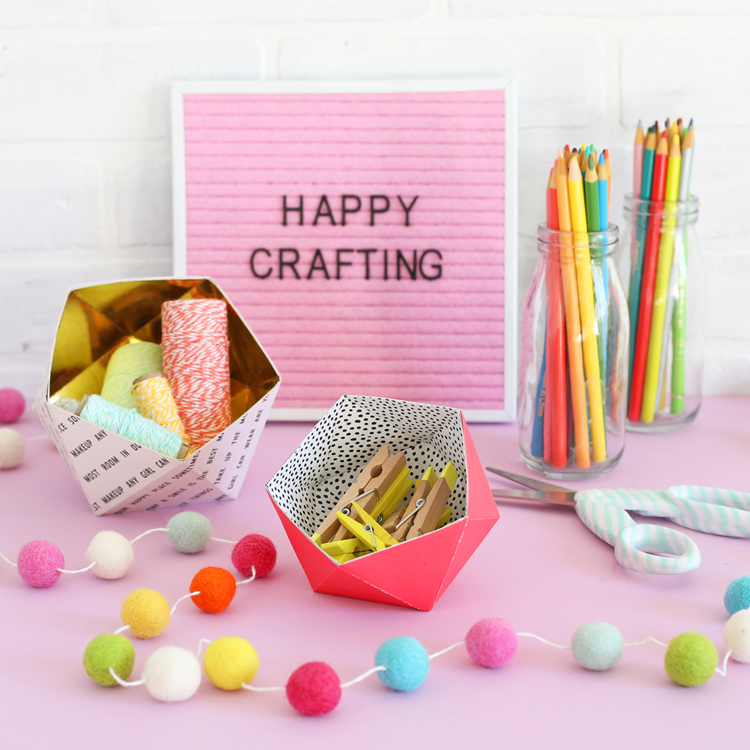
Simple Yarn Wall Hangings
Transform a boring wall with colorful yarn. For this fun craft to do when you’re bored, gather some yarn, a dowel, and scissors. Beginners and experts can craft charming yarn wall hangings. Step-by-step guides can show how to tie knots and patterns. Let your creativity flow and make your macrame masterpiece. Use different colored yarns for vibrant designs or single shades for elegance.
Macrame Wall Art
Macrame wall art adds texture and warmth to any room. It involves knotting yarn for intricate patterns. It’s a rewarding craft, perfect for all ages. You can create various shapes and sizes, from small hangings to large statement pieces. Watch tutorial videos or read guides for different knot styles. Endless possibilities exist, from simple wall hangings to complex macrame projects. Explore fun crafts to do when you’re bored and enjoy the process of making unique macrame wall art.
Upcycled Tissue Box Monsters
Crafting with recycled materials is both fun and eco-friendly. One such activity is making upcycled tissue box monsters. This project is perfect for a Halloween craft that engages kids of all ages and helps them unleash their creativity.
Halloween Craft for Kids
To start your tissue box monsters, you’ll need empty tissue boxes, various paints, markers, and any other decorative items like googly eyes and pipe cleaners. Begin by painting the tissue box in bright, spooky colors. Once the paint dries, kids can draw and color scary or funny faces. Finish by adding googly eyes, teeth cut out from white cardstock, and pipe cleaners for legs or antennae. These monsters make for an excellent Halloween decoration or can act as playful storage for kids’ trinkets. It’s a wonderful way to turn potential trash into a treasure that’s both useful and decorative. With just a little bit of time, materials you have at home, and your imagination, you can have a blast with this simple and enjoyable activity, which is one of many fun crafts to do when you’re bored.
Handmade Fruit Fans
When the heat rises and boredom strikes, handmade fruit fans are a refreshing summer-themed craft project ideal for all ages. With simple, easy-to-find materials such as paper, popsicle sticks, glue, and paint, you can create functional artwork that exudes a cheerful vibe.
Summer-Themed Craft Project
- Gather your basic crafting supplies like colorful paper, paints, popsicle sticks, and brads.
- Cut the paper into the shape of your favorite fruits—think vibrant watermelons, tangy oranges, or bold kiwis.
- Paint the details onto the paper to mimic the look of real fruit slices. Let the creativity flow!
- Attach a popsicle stick handle to your paper fruit with glue or brads to create the fan’s structure.
- Optionally, decorate with glitter, stickers, or other embellishments to add an extra sparkle to your summer craft.
This craft not only helps beat the heat but also encourages creativity and offers a fun way to spend time together. These fans are functional, making them perfect for hot summer days or as charming decor for a themed party. So grab your supplies, and start folding and painting fun crafts to do when you’re bored!
DIY Embroidered Hats
Embroidery can transform a simple hat into a work of art. With a needle, thread, and a hat, you can start this cost-effective craft. Hand embroidery allows for countless designs, from florals to initials. It’s a soothing activity that results in a one-of-a-kind accessory.
Hand Embroidery for Beginners
Beginners can follow these steps to create their first embroidered hat:
- Choose a hat and embroidery thread in desired colors. A basic baseball cap works well.
- Sketch a simple design on paper. Choose easy shapes for your first project.
- Use an embroidery hoop, if possible, to keep the fabric taut while you stitch.
- Start with basic stitches, like the backstitch or running stitch.
- Practice stitching on scrap fabric before you begin on the hat.
- Transfer your design onto the hat using a washable fabric marker.
- Begin stitching, following your design and securing thread ends well.
- Once completed, remove any markings from the hat.
- Wear or gift your unique embroidered hat, showcasing your new skill!
Embroidering a hat by hand allows for personal expression and a relaxing craft experience. Enjoy the process and the pleasing results of your fun craft when you’re bored.
Custom Scented Candles
Creating custom scented candles is both a fun and practical craft. These candles can light up your home and fill it with your favorite scents. Learn how to make your personalized home fragrance with simple steps.
Personalized Home Fragrance
- Collect mason jars or other heat-safe containers for your candles. Choose the size based on where you plan to use them.
- Purchase soy wax flakes, essential oils for scent, and wicks from a craft store. Soy wax burns cleaner and is eco-friendly.
- Melt wax flakes in a pot. Monitor the temperature with a thermometer to prevent overheating.
- Secure the wick in the jar’s center. You can use a holder or glue it to the bottom.
- Once the wax is melted, let it cool slightly. Then, add a few drops of essential oil.
- Pour the scented wax into jars, making sure to keep the wick straight and centered.
- Allow candles to cool and solidify. This may take several hours or overnight.
- Trim the wick to about a quarter inch above the wax.
- Light your candle and enjoy. The custom scent will enhance your mood and decor.
- Remember, you can combine different oils to make unique blends. It’s a cozy craft to do when you’re bored, and it brings lasting enjoyment.
Ladybug Rock Painting
Turning a simple stone into a charming garden decoration is both enjoyable and simple. This project involves painting rocks to look like ladybugs, and it’s an excellent way for people of all ages to express their creativity.
Easy Garden Decoration
- Find smooth, flat rocks that resemble a ladybug’s shape. A trip to the garden or park might just provide the perfect canvas.
- Wash the rocks clean and let them dry before painting. This will ensure the paint adheres well.
- Select red and black acrylic paints, ideal for outdoor crafts due to their durability.
- Paint the rock red, covering its surface completely. Two coats may be needed for the best effect.
- Once the red paint dries, use black paint to create the head, spots, and a line down the center to mimic the ladybug’s wings.
- Let the paint dry fully and then apply a clear sealant to protect your ladybug from the elements.
- Position your completed ladybug rocks in your garden, on a windowsill, or anywhere you wish to add a touch of whimsy.
Ladybug rock painting is a ‘fun craft to do when you’re bored’ and will bring life to your outdoor space. It’s a quick and cost-effective way to create eye-catching garden decorations. Not only can these painted rocks brighten up your own home, but they also make adorable gifts for friends and family.
Square Pots for Mini Cacti
Turn your old tiles into chic home decor with square pots for mini cacti. It’s a straightforward and cost-effective craft to add elegance to any space.
Chic Home Decor Craft
- Start by picking 12 square tiles and one rectangular tile for the base.
- Use a strong adhesive to form a cube-shaped pot, sticking the tiles together.
- Allow the glue to dry completely for a sturdy finish.
- Add your favorite mini cactus or succulent to the new pot.
- Feel free to paint the tiles before assembly for a pop of color.
- Decorate with patterns or stickers to match your home’s style.
- Display these trendy pots on a window sill, desk, or as part of a shelf arrangement.
Creating square pots for mini cacti is a fun craft to do when you’re bored. They provide a modern look that livens up any indoor landscape. Plus, these mini cacti pots can make fantastic gifts for friends that love plants.
Fun Rocket Crafts for Kids
Ignite kids’ imaginations with fun rocket crafts. Perfect for aspiring astronauts, these projects combine creativity and learning.
Space-Themed Activity
- Gather supplies: cardboard tubes, colored paper, glue, scissors, and markers.
- Have kids cover tubes with paper for the rocket’s body.
- Cut and attach triangles for the top cone and fins.
- Decorate with markers to add windows and flames.
- Launch day! Kids can fly their rockets around the room.
Creating rockets is a blast for kids, making it a top fun craft to do when bored. This activity teaches about space while providing hands-on creative play.
Patriotic Tin Can Windsocks
Transform discarded tin cans into vibrant Fourth of July decorations with this easy and eco-friendly craft.
Fourth of July Decor Project
- Collect empty tin cans and remove labels and glue residues.
- Paint each can in red, white, and blue, reflecting the patriotic theme.
- After the paint dries, punch holes around the can’s bottom edge for ribbons.
- Cut ribbons in patriotic colors and tie them through the holes.
- Attach a wire or string to the can’s top for hanging.
- Use alphabet stickers or stencils to add ‘USA’ or stars.
- Display your windsocks outside to complement your Fourth of July decor.
This craft not only recycles but also adds festive cheer to Independence Day celebrations. Enjoy this fun craft to do when you’re bored, and show off your patriotic spirit.
Environmentally-Friendly Bug Hotels
Celebrating Earth Day gets exciting with do-it-yourself bug hotels. They’re perfect for garden lovers and eco-enthusiasts. Gather simple materials and give something back to nature. These hotels become haven for many beneficial insects.
DIY Project for Earth Day
Make your Earth Day special with a fun craft. Bug hotels are easy and impactful. You just need:
- Containers like oatmeal boxes, nylon screens, and scissors.
- Use glue guns, bead caps, and twine for assembly.
- Decorate with paints or natural materials.
- Place your bug hotel in a quiet garden spot.
- Watch as insects make it their home.
Celebrate the planet’s beauty by creating shelters for its smallest inhabitants.
Toilet Paper Roll Binoculars
Turning empty toilet paper rolls into playful binoculars is a creative and eco-friendly activity. It’s a fantastic way to recycle while having fun. This craft is ideal for engaging children in a hands-on project, which not only fosters their creativity but also teaches them about upcycling and reusing materials.
Fun Upcycling for Kids
- Collect Materials: You’ll need two toilet paper rolls, some colorful tape or paint, glue, yarn or string, and optionally, some decorations like stickers.
- Decorate Rolls: Let kids cover the rolls with tape or paint them in colors they love. They can add stickers or draw designs to personalize their binoculars.
- Attach Rolls: Use glue to stick the two rolls together side by side. Make sure they are secure.
- Add String: Tie yarn or string to each roll to create a neck strap. This way, kids can wear their binoculars.
- Enjoy Adventure: Now, with their new binoculars, kids can go on backyard safaris or watch birds from their windows.
Creating binoculars from toilet paper rolls is perfect for an afternoon of crafting. With minimal supplies, kids can easily make a toy that will give them endless entertainment. It’s a delightful example of ‘fun crafts to do when you’re bored’ and leads to an exciting playtime adventure.
How to Make a Paper Fan
Paper fans are a timeless craft that can bring a modern touch to any setting. Making a paper fan is simple, requires few materials, and offers a creative way to cool down or decorate a space. The process can be a tranquil and satisfying craft to do when you’re feeling bored, and it can be personalized to fit any style or occasion. Here’s a step-by-step guide for creating your own paper fan with a modern twist.
Classic Craft with Modern Twist
- Choose paper: Pick colorful or patterned paper to match your personal style.
- Fold accordion-style: Create even pleats by folding back and forth along the entire sheet.
- Attach a handle: Secure a popsicle stick at each end using double-sided tape or glue.
- Bind together: Fasten the bottom of the folds with glue, a paper clip, or a staple to hold the fan’s shape.
- Add details: Personalize with stickers, drawings, or ribbons to give your fan flair.
- Display or use: Open up the fan to use on hot days or display as part of your decor.
With these steps, you can craft a beautiful paper fan that showcases your creativity. It’s a quick and fun craft to do when you’re bored that also serves a practical purpose.
DIY Frog Crafts
Creating your own frog crafts is a delightful springtime activity. Kids and adults can enjoy making these whimsical creatures. It’s an ideal project for those looking for fun crafts to do when you’re bored. Gather simple materials such as paper plates, colored cardstock, and markers to bring these amphibians to life.
Easy Spring Craft Activity
- Prepare Your Materials: Collect paper plates, green paint, cardstock, markers, and glue.
- Paint the Plate: Cover the paper plate with green paint to form the frog’s body.
- Cut the Shapes: From the cardstock, cut out legs, eyes, and a big smile.
- Assemble: Glue the legs to the bottom of the plate, and the eyes on top.
- Draw Details: Use markers to add nostrils and the smile to your frog’s face.
- Make it Fun: Customize your frog with stickers, glitter, or even googly eyes.
This project is perfect as an easy spring craft activity and for teaching kids about amphibians. It’s a wonderful way to unleash creativity and fight boredom, making it one of the best fun crafts to do when you’re bored.
Large Paper Flowers for Decoration
Create stunning large paper flowers to enhance your home decor or as highlights at events.
Elegant Event Decor Crafting
- Gather Materials: You’ll need lightweight paper or cardstock, a glue gun, scissors, and a template for petal shapes.
- Cut Petals: Use the template to cut petals in different sizes from the paper.
- Form Base: Create a solid base using a cardboard circle. This is where you’ll attach petals.
- Assemble: Glue petals to the base, starting with the largest size. Overlap them for a full look.
- Complete the Center: Use smaller petals and a button or pom-pom for the flower’s middle.
- Add Finishing Touches: Curl the petal edges for a natural effect. Use markers for details.
- Display: Place these flowers on walls or tables at parties, weddings, or in your living room.
These paper flowers provide a fun craft to do when you’re bored, and can truly transform a space into something special.
Origami Frogs Tutorial
With simple paper and creativity, make origami frogs – a fun craft when you’re bored.
Interactive Paper Folding
- Choose Paper: Pick a square piece, the brighter, the better.
- Fold Base: Make a series of folds to create the frog’s shape.
- Detailing: Add eyes, and maybe a tongue, with markers or stickers.
- Jumping Action: Fold the back to make your frog leap.
- Play Along: Have frog jumping contests with friends or family.
Origami frogs are great for kids and adults. They’re perfect to teach about nature and offer a playful experience. This craft is a top choice for those looking for interactive fun crafts to do when you’re bored.
Paper Chain Wall Hanging
Colorful Room Accessory
Decorate your space with a vibrant paper chain wall hanging. This fun craft to do when you’re bored is both simple and stylish. Start by choosing various colored cardstock for your chains. Cut the cardstock into strips, each about 1 inch wide and 17 inches long. Loop one strip into a circle and secure it with a glue gun or tape. Slide another strip through the first loop and secure it to form a chain link. Repeat this process, alternating colors to create a visually pleasing sequence. Once your chain reaches the desired length, tie a thick jute rope to each end, making it ready to hang.
This playful wall decor can brighten a child’s room, add flair to your living area, or serve as a party decoration. It’s an affordable craft that repurposes materials you likely have at home. Plus, it’s a great way to involve kids in a creative activity. Hang your paper chain masterpiece and enjoy the splash of color it adds to your surroundings.
Tattoo-Printed Planters
Transform your ordinary planters into incredible conversation pieces with tattoo-printed designs. This craft merges gardening with artistry, providing a novel way to revamp your home decor.
Novelty Home Decoration
- Select plain planters as your canvas; terracotta pots work beautifully.
- Choose printable tattoo paper and an inkjet printer for this project.
- Pick your favorite designs or patterns to print on the tattoo paper.
- Clean the planter surface to ensure the tattoo adheres smoothly.
- Cut out the printed tattoos and apply them carefully to the pots.
- Use a damp sponge to transfer the tattoo from the paper to the pot.
- Seal the design with a coat of clear acrylic spray to protect it.
- Let it dry completely before adding soil and plants.
This ‘fun craft to do when you’re bored’ offers a unique touch to your plant display. It’s a simple yet effective way to personalize your space with minimal effort and cost.
Homemade Snow Globes
Making snow globes at home is a delightful and creative craft. It can turn an ordinary day into a magical one as you create your own tiny winter wonderland scenes. This craft is perfect for personal use, or as a thoughtful and unique gift for someone special. Here’s how to make your own snow globes with a few basic materials.
Unique Gift Idea
- Gather Your Materials: You’ll need a clear jar with a tight-fitting lid, distilled water, glycerin, glitter, and a small waterproof figurine.
- Prepare the Figurine: Glue the figurine to the inside of the jar lid using waterproof adhesive. Let it dry completely.
- Fill the Jar: Mix distilled water and a dash of glycerin in the jar. The glycerin helps the glitter float slowly.
- Add Glitter: Sprinkle glitter into the water. Choose colors that complement your figurine and create a snowy effect.
- Assemble the Globe: Screw the lid back onto the jar, ensuring the figurine is submerged and secure.
- Seal the Globe: For extra security, apply a layer of strong glue around where the lid meets the jar. This prevents leaks.
- Shake and Enjoy: Shake your snow globe gently to watch the glitter swirl around your figurine.
- Gift or Display: Give your homemade snow globe as a present or keep it to brighten your space.
Snow globes are a fun craft to do when you’re bored, and they offer a sparkling touch to any room. Everyone’s eyes light up at the sight of a snow globe, and making them yourself adds a personal touch that cannot be bought in stores.
Felt Flower Hair Clips
Accessorize your look with handmade felt flower hair clips. This delightful craft is not only easy to do when you’re feeling bored, but it also adds a touch of charm to any outfit. Perfect for gifting or keeping for yourself, these lovely hair clips can be made in a variety of colors and sizes to suit your style or mood.
Accessorizing with Crafts
- Choose Your Felt: Pick soft felt in colors you love. Bright hues are especially cheerful.
- Cut Flower Shapes: Create petal cutouts using scissors. They don’t have to be perfect.
- Arrange Petals: Layer the petals to form a flower. Play with different designs.
- Stitch or Glue: Attach the petals together with thread or fabric glue. Either works fine.
- Attach to Clip: Secure your flower to a plain hair clip. Let it set if glued.
- Embellish: Add beads or a button to the flower’s center for extra flair.
- Style Your Hair: Slide in your hair clips. They’re ideal for casual or formal looks.
One of the ‘fun crafts to do when you’re bored’, felt flower hair clips allow you to express your creativity. They are easy to make, requiring just a few simple items, and the result is a cute and fashionable hair accessory that can brighten anyone’s day.
Yarn Turtle Craft
Creating a yarn turtle craft is a delightful project to share with children or enjoy solo. It’s not only a cute addition to your craft repertoire but also a gentle nod to ocean life. This DIY activity is inexpensive and uses materials most people have at home, making it the ideal fun craft to do when you’re bored.
Adorable Ocean-Inspired DIY
- Collect Supplies: You’ll need green yarn, a small piece of cardstock, scissors, and glue.
- Shape the Turtle: Use the cardstock to make a body and head for your turtle.
- Wrap with Yarn: Cover the cardstock shapes with green yarn. Wrap until you have a shell-like texture.
- Attach Parts: Glue the head to the body, then add a small piece of yarn for the tail.
- Add Details: Cut and glue small circles of cardstock for feet. Use markers or paint for eyes.
- Finish Crafting: Once assembled and dry, your turtle is ready. Display it in your home or gift it.
This craft brings a touch of the ocean to your home. Kids will love the process and end product. It’s a simple yet rewarding way to spend your free time. Start creating, and soon you’ll have a charming yarn turtle to call your own.
Toilet Roll Octopus Craft
Transform empty toilet roll tubes into friendly ocean dwellers with this quick craft. It’s wonderful for kids and injects fun into a boring afternoon. Using simple household items, you’ll create a charming octopus friend in no time.
Quick Ocean Craft for Kids
- Collect Supplies: Grab toilet rolls, colorful paints, googly eyes, and scissors.
- Paint Tubes: Coat the outside of the toilet rolls in bright colors. Let them dry.
- Create Tentacles: Cut the bottom half of the roll into strips. Curl them outward.
- Add Eyes: Stick googly eyes above the tentacles to give life to your octopus.
- Decorate: Use markers to draw a smiling mouth and add details.
- Play Time: Let kids invent stories with their new octopus craft.
This toilet roll octopus is a simple and enjoyable way to recycle. It also encourages creativity and storytelling among kids, making it one of the fun crafts to do when you’re bored.
Folding Popsicle Stick Fans
Turning ordinary popsicle sticks into elegant folding fans is a delightful craft.
Reviving Traditional Crafts
- Select Popsicle Sticks: Choose colorful ones for bright fans, or plain for classic looks.
- Drill Holes: Carefully drill a hole at the end of each stick for assembly.
- Decorate: Paint or decorate your sticks with markers, glitter, or washi tape.
- Assemble: Line up sticks, thread a ribbon or string through holes, and tie securely.
- Fan Out: Spread the sticks into a fan shape, and secure with a clip or knot.
- Enjoy: Your new fan is ready. Use it on hot days or as a fun decoration.
This traditional craft is not only a ‘fun craft to do when you’re bored’ but also a nod to historical handcrafting techniques, blending creativity and functionality.
Treasure Jewel Magnets
Add sparkle to your fridge or magnetic board with treasure jewel magnets. This easy craft can be done with minimal materials and is perfect for an afternoon of creativity.
Sparkling DIY Magnets
- Gather small wooden circles and jewel-toned acrylic paints.
- Paint the wooden circles with your chosen colors and let them dry.
- Choose an assortment of craft jewels and plan your design.
- Use Jewel-It glue to attach the jewels to the painted wood.
- Allow the glue to set according to the package instructions.
- Glue small circle magnets to the back of the wood.
- Once dry, your sparkling DIY magnets are ready to use.
This ‘fun craft to do when you’re bored’ transforms simple items into dazzling accessories for the home or office.
Sock Cat Craft
Creating a sock cat is a perfect craft for a lazy afternoon. With just a few common household items, you can make a soft and cuddly companion to snuggle with. This project is not only simple and enjoyable but it also enables you to recycle old socks, adding a touch of sustainability to your crafting endeavors.
Cozy Companion Creation
To make your own sock cat, follow these easy steps:
- Choose Your Socks: Pick an old pair of socks. Patterns or colors add personality.
- Fill with Rice or Stuffing: Use rice or polyester stuffing to fill one sock. This forms the cat’s body.
- Tie or Sew the End: Securely close the sock’s open end. This keeps the filling in place.
- Create the Head: Shape the filled sock to form a head and body. A rubber band can help segment it.
- Add Features: Cut the other sock for ears, tail, and paws. Sew or glue these on.
- Draw a Face: Use markers or thread to give your cat eyes, a nose, and whiskers.
- Final Touch: Accessorize! Add a small scarf or a ribbon collar if you like.
Once finished, your sock cat is ready to be adored. Create a collection or gift them to friends. It’s a wonderful ‘fun craft to do when you’re bored’ and results in an adorable creation for all ages to love.
Recycled Animal Planters
Transform old bottles and containers into adorable animal planters. This craft gives a new life to your used items.
Garden Decor with a Twist
- Choose Your Container: Pick plastic bottles or containers, ideally with interesting shapes.
- Clean Thoroughly: Wash out any residue from the bottles to prepare for painting.
- Cut and Shape: Snip the bottles to create the animal’s body. Use scissors carefully.
- Paint and Decorate: Apply acrylic paints to design your animal. Get creative with colors!
- Add Details: Use markers or cut-out pieces of felt for features like eyes and ears.
- Plant: Fill with soil and add a plant. Succulents or herbs work great.
- Display: Put your new animal planters in the garden or on a windowsill. Enjoy!
Creating these planters is a playful way to brighten your garden and repurpose waste. It’s a perfect craft for a lazy day at home.