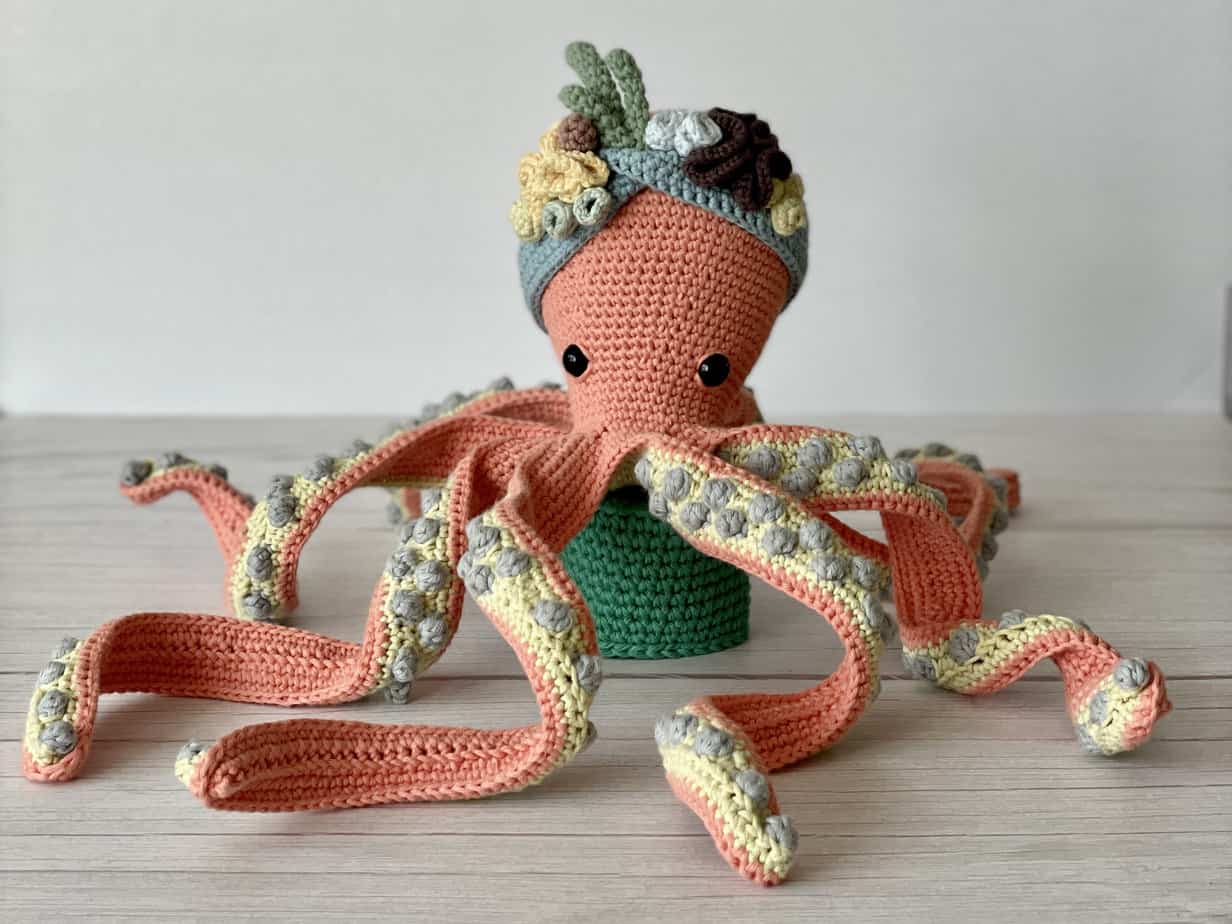
The world of amigurumi, the art of crocheting adorable stuffed creatures, offers endless possibilities for creating whimsical companions. And what’s more delightful than a cuddly octopus? With its eight wiggly legs and expressive eyes, an amigurumi octopus is a perfect project for crocheters of all skill levels. So, grab your yarn, crochet hook, and get ready to embark on an underwater adventure!
Materials:
- Worsted-weight yarn (in your preferred colors for the body and eyes)
- Crochet hook (size appropriate for your yarn weight)
- Polyester stuffing
- Yarn needle
- Safety eyes (optional)
- Stitch marker (optional)
- Scissors

Choosing Your Yarn and Hook:
The beauty of amigurumi lies in its customization. Pick a yarn color that sparks joy – a vibrant blue, a playful pink, or perhaps a classic seafoam green. Opt for worsted-weight yarn, a versatile thickness that creates a nice balance between project size and detail. When selecting your crochet hook, ensure it corresponds with the recommended size for your chosen yarn. A slightly smaller hook will result in a firmer, more durable octopus, while a larger hook will yield a softer, floppier one.
Let’s Get Hooked: Basic Stitches
Before diving into the octopus itself, let’s go over the fundamental stitches you’ll need. The magic ring (also known as the adjustable ring stitch) forms the base of your amigurumi. If you’re unfamiliar with this technique, there are plenty of helpful video tutorials online to guide you. Once you’ve mastered the magic ring, the single crochet (sc) stitch is your workhorse. Simply insert your hook into the indicated stitch, yarn over, and pull through both loops on your hook. Repeat to create a continuous spiral.

Building the Body:
We’ll begin with the octopus’s head and body. Using the magic ring, create a circle of six single crochets. In the next round, increase in each stitch around (12 stitches total). Here’s where your stitch marker comes in handy – it helps keep track of the beginning of your round. Continue crocheting, increasing in every other stitch for a few rounds (the number of rounds will depend on your desired octopus size). Once you’ve reached your preferred body width, continue crocheting without increasing for several rounds to establish the body length.
Shaping the Head:
Now comes the shaping. To create the roundness of the head, start decreasing. Here’s a simple method: crochet two single crochets together (sc2tog). Essentially, you’ll insert your hook into two stitches, yarn over, and pull through all three loops on your hook. Repeat sc2tog around, decreasing one stitch every other stitch. Continue decreasing in this manner for a few rounds until you have a small opening remaining. Stuff the body firmly but not too tightly with polyester stuffing. Finally, sew the opening closed using your yarn needle.

Crafting the Adorable Eyes:
There are two main options for eyes: crocheting them or using safety eyes. For crocheted eyes, create two small circles in a contrasting color using the magic ring and single crochets. Sew them securely onto the head. Safety eyes, available at craft stores, are a great alternative, especially for projects intended for young children. Simply insert the safety eye’s post through the head and secure the clasp on the other side.
The Wonderful World of Legs:
Now for the fun part – the eight wiggly legs! Chain a desired length for each leg (the length determines how long your octopus’s tentacles will be). Once you’ve reached your preferred length, single crochet all the way back down the chain, creating a basic leg shape. Repeat this process seven more times to create all eight legs.

Attaching the Legs:
There are two ways to attach the legs. The first method involves sewing each leg individually onto the body, ensuring even distribution. The second method involves crocheting the legs directly onto the body as you go. Here’s how: When you finish crocheting the body to its desired length, instead of starting a new round, crochet directly into the side of the body using single crochets. Chain a few stitches to create the base of the leg, then single crochet down the chain and back up the body, essentially crocheting the leg as part of the body round. Repeat this process for all eight legs, positioning them evenly around the body.
Finishing Touches:
Stuff each leg lightly with polyester stuffing for a more realistic, floppy feel. Add a final touch by embroidering a cute smile or a surprised expression on the face using your yarn needle and contrasting yarn.

Ensuring secure attachments and no small parts
Here’s how to incorporate ensuring secure attachments and avoiding small parts when crocheting your amigurumi octopus:
Secure Leg Attachment:
- Sewing Method: When sewing the legs on individually, use a strong thread or yarn and ensure each leg is securely fastened to the body. Double-check your stitches to prevent any loose threads that could unravel.
- Crocheting Method: If you choose to crochet the legs directly onto the body, make sure your stitches are tight. You can achieve this by using a slightly smaller hook size than recommended for your yarn or pulling your stitches slightly tighter than usual. This creates a stronger connection between the leg and the body.
Avoiding Small Parts:
- Eyes: Opt for embroidered eyes instead of safety eyes, especially if the amigurumi is intended for young children who might put it in their mouths. You can embroider simple circles or add details like pupils.
- Stuffing: Use a stuffing material that won’t clump or come out easily through gaps in the stitches. Consider using a finer grade of stuffing for the legs to prevent them from becoming bulky.
- Final Check: Before gifting or using your amigurumi, do a final check for any loose threads, yarn ends, or stuffing poking out. Trim any excess yarn and secure any loose ends by weaving them back into the body with your yarn needle.
By following these tips, you can create a safe and cuddly amigurumi octopus that everyone can enjoy!
You’ve successfully crocheted an adorable amigurumi octopus! This charming creation is perfect for cuddling, displaying, or gifting. Remember, amigurumi is all about personalization.